Monday 27 November 2017

Hollow Form Print Progress

This is the concept picked out of Mark's batch of hollow form concepts, mildly resembling a twisted water tower
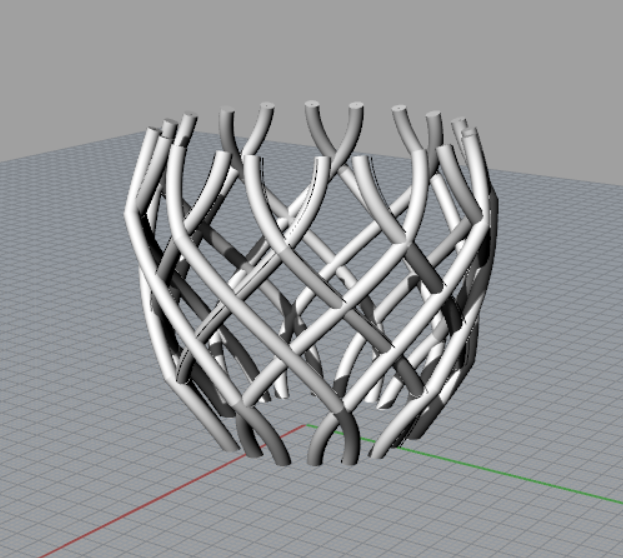
This is my concept that was chosen out of my 10. It has essentially no function and was made purely for aesthetics.
I know that my sketches are incredibly crude but I've always found that quickly getting mt ideas onto paper is much more effective for me than putting time into properly drawing the concepts in a realistic manner. As well I find doing really rough concepts helpful because the less refined they are, the more there is open to interpretation. This leaves room for new ideas to be easily added in your mind if any come up in the future.
 Mark and I were pretty stumped on the combination of our 2 designs for quite some time. A lot of the ideas we were making into rhino models were definitely visually interesting but there was just something missing from all of them. We remained stumped with one of our concepts until we realized that we could essentially just take the cap off of it and turn it into a chalice. With a few hours of mixing and refinement we ended up with something that I think we are both pretty proud of. For assurance we each made our own final version of the chalice idea so we could have 2 options of models to print.

For an unknown reason when we went to print off the chalice, slicer decided to make the center mesh handle solid. Because we were so caught up in the excitement of actually printing something off for the first time, neither of us realized that the one part was going to print solid until we were already 40 minutes into the print. So our options now are to either fix the model we are currently using or to send the 2nd model we created to the printer. Either of these two options would work fine.

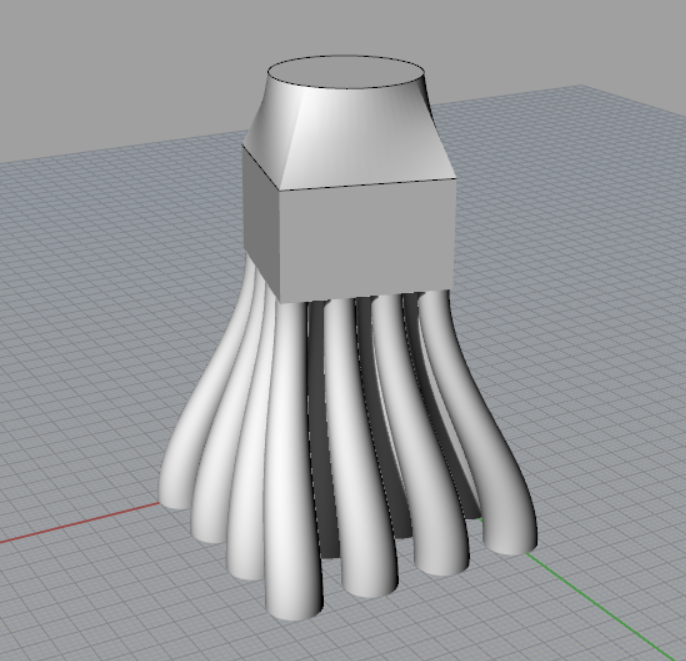
Another modification I'd like to make to the model would be to decrease the angle at the base of the chalice. In our first attempt at printing some parts at the bottom got a little bit wispy because it was printing at such a high angle

Tuesday 14 November 2017

Papercraft Project Complete!

It's complete! After hours of tedious work the project came together. I never made a final parts count but it is easily in in the 110-150 range, which is something that made this project such a personal grind.


While overall I am happy with the final product, there are absolutely things I would/will change about it. I think the most obvious issue with it is the mounting. The paper frame I made for the texture doesn't live up to my own standards in that it's sloppy, and not very well thought trough. This especially sticks out as an annoyance because if I gave myself just a little bit more time, it would have been fine, but by not taking the extra couple of minutes to thoughtfully plan it out, the frame ended up the way it did. Another future revision would be the addition of a way to hold down the texture in the frame. In its current state, the tessellation is simply sitting inside the frame with nothing holding it in other than friction. The lack of a hard connection is due to the fact that the tessellation only ever intersects the base of the frame perpendicularly.


Something I find to be just about, if not equally as interesting as the texture itself, are the shadows caused by close lighting.

In summary, this project proved to be an excellent learning experience. Not only about projects like this, but also how I work through them. Long and repetitive tasks, like the one I set myself, cause me to work in a way I'm not entirely happy with and produce works which reflect that. If I were to do something similar in the future I would definitely need to work in many short intervals to keep myself from getting super fatigued and mentally exhausted.

3D Hollow Form Concepts


Monday 6 November 2017

Papercraft Project: Final in Progress

So it turns out that I vastly underestimated the time it takes to score and cut the templates for my project, so as of now, it is incomplete. For the final of this project, after taking into consideration the feedback from our first prototype crits, I decided to move the project in a direction that would make it as accessible to as many people as possible. This decision was to make it a primarily visual piece. As much as I was intrigued by the idea brought up in the crits to incorporate movement and tactility, I believe that these idea would make creating a clean and professional looking project very difficult. My final solution was to enlarge and replicate the texture I had created for the first prototype over a roughly 1 foot - 2 foot area. I first enlarged each component by about 50%, then replicated the tecture and cropped it to my desired size.
 This size, as seen in the image above, ended up being 17 1/4in by 11 1/2in. because the texture is cropped into a frame, cut components of the texture were created. These specialized parts obviously need their own templates, which can be seen highlighted above in red, cyan, and white.
 I dug through the model and found each unique part, unfolding it and making it 2D. Because these special parts are unique to the mesh they are a part of, they need to be printed in specific colours. Using the "text" command in Rhino, I first numbered each part, then made a quick inventory of of what parts are in what colours, and how many of them are needed.
Wrestling all of the parts required onto the same page turned out to be quite the task, with only one template having a minor cut off by the restrictions of a printer. In total the print came out to be 18 pages. 6 white, 6 charcoal, and 6 blue.
 So this is where the underestimation of time required comes in. As of Monday night (November 6), all 18 pages have been scored for folding and 6 have had the shapes cut out of them. While not being physically difficult, these shapes appeared to be a challenge to my sanity. This ended up being a learning experience for myself in that not I know that projects involving immense repetition, like this, have a very hard time with holding my attention.
I apologize for not having my finished product ready by the time this blog post is being written, but hopefully I will have something presentable by class on Wednesday. Once it is completed I will create a follow up post on the final project.